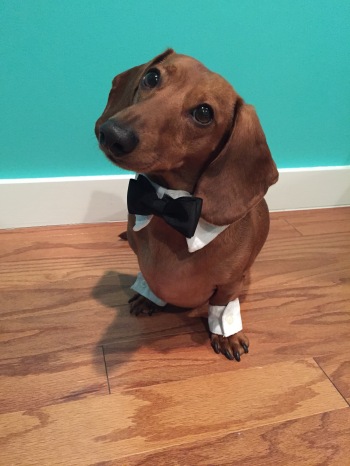
So this weekend Frank is going to prom. Yes, prom. We are part of the NYC dachshund meet up group and the next event is the dachshund Valentine’s Day Prom. So far over 70 people have RSVP’d so I can’t wait to see all the weenies!
Obviously I can’t send Frank not wearing anything. We looked into buying a tux or something of that sort but they are all SO expensive and we also don’t know how it will fit his odd shape. Finding clothes that actually fit him can be such a struggle. So I decided to make my own version of a tux using a toddlers button down for only $10 from Target!
You will need:
- Childs white button down shirt (I used a boys 5T) *
- Fabric scissors
- Needle and thread
- Hot glue
- Lighter or candle
- Pen or marker
- Two larger pieces of grosgrain ribbon (I used 7″ of 1.5″ thick grosgrain) *
- One smaller piece of grosgrain ribbon (I used 2.25″ of 1.5″ thick grosgrain) *
- Elastic ribbon (I used 2.25″) *
- Small felt circle *
*This will vary depending on the size of your dog

Take your shirt and trim off the collar at the seam. I purchased a 5T shirt from target. I kind of estimated how big his neck was. Make sure you try the collar around your dog before you cut anything!
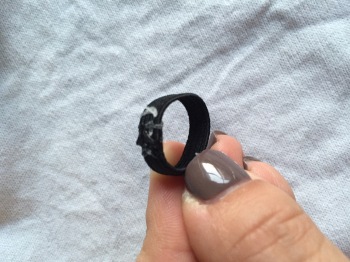
Do the same with the sleeve collars. You should end up with something that looks like this.
Measure your dogs wrists and make a dot to mark where to place your button.
Cut your sleeve collar about a quarter of an inch from your dot and sew the edge shut. Then sew your button on. Make sure it all aligns before sewing.
Heat seal your edges using a lighter or a candle. It will keep the ribbon from fraying.

Fold the two bigger strips of ribbon in half and make a crease. Bring the two ends to the middle and sew together.
Pull the thread, wrap thread around, and knot. You should end up with something like this.
Repeat to make another bow but do not cut off the thread after you have knotted it.
Stack the other bow on top, wrap thread around to secure, and then knot in the back.
Take your smaller piece of ribbon, fold in thirds, and glue on the ends to make a nub. Wrap the nub around the middle of your bow tie and hot glue together in the back.
Heat seal the edges of your elastic and hot glue together. Depending on the collar size, this will vary. For Frank, I used a 2.25″ piece.
Once your elastic has cooled and set, glue down onto the back of the bow tie.
Once that has completely cooled, take a small round piece of felt and hot glue on top of the glued elastic. This will keep the bow tie from irritating your dogs neck. Once that has cooled, attach it to your dogs collar, slip on all your pieces, and admire the cuteness!
Now that Franks outfit is complete, we gotta find him a date! Any takers?


This is so cute! ❤
LikeLike
Thank you! 🙂
LikeLike
Oh this is a great idea. So cute 🙂 Frank looks great.
LikeLike
Thank you so much! I do agree he looks quite dapper 😉
LikeLike